Lightning Bolt Computers (734) 395-9367 http://www.lightbolt.com
4
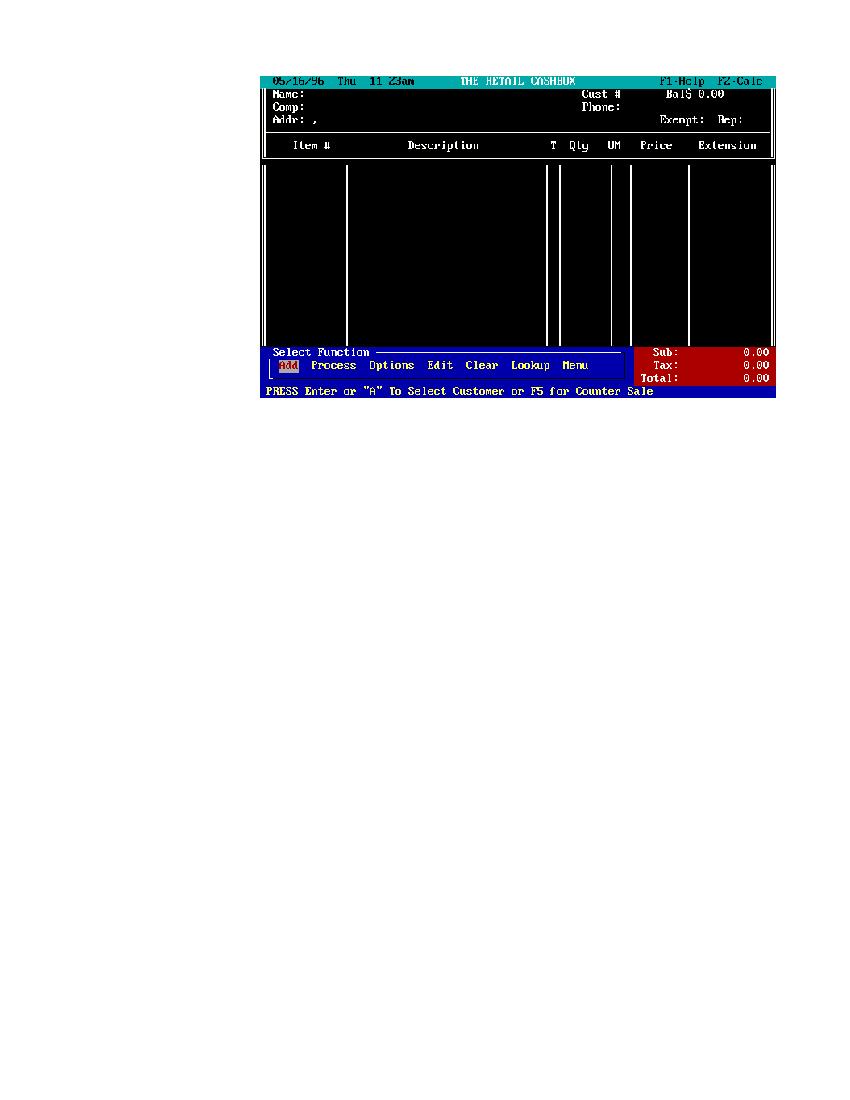
Main Work Screen
* From this screen you will be conducting 90% of your work. To make the program as user friendly as possible there are only a few keys to
learn. The main work screen has three distinct parts.
* The top of the screen holds the following customer information - name, company name, address, phone, customer number, balance owed,
taxable status and the sales person identification.
* The middle part of the screen holds the inventory items to be sold, and basic information about that inventory item - item number,
description, taxability, quantity, Unit of measure, price and its extension.
* The bottom of the screen to the right in red is where the subtotal, tax and total of the work sheet items are.
* The left side is where you select the menu functions from.
* The last line on the bottom of the screen will give you an explanation of the function highlighted, sort of mini help.
* The first and most important key is the
!
function key. By pressing this key you will bring up the context sensitive help screen.
While in the help screen you can jump to any of the topics shown on the right side of the screen.
* The
@
function key will activate the pop-up calculator for quick number crunching. When the calculator is present on the screen
instructions for use are located on the lower part of your screen.
X
will return you to the main work screen.
*
$
Sets last item sold to another sales person
*
%
will place counter sale for your customer
*
^
will open a cash drawer if present.
*
&
displays amount of cash in the cash drawer.
*
(
will calculate the Canadian goods and service tax and place it as last item
*
Q
and
R
arrow keys are for moving to the function you wish to run.
* To coincide with the arrow keys you may use the first letter of the function you would like to select such as (
a
,
p
,
o
,
e
,
c
,
l
,
m
).
An example of this would be pressing the letter
m
which would bring you to the menu screen.
* The (Insert) key can be used to enter inventory items without going into the inventory pop-up list. This is a quick method of entering
items you already know the item number for or if you would like to enter a blank item line or comment. You can also use a bar code reader
here as well. If no customer has been selected yet, insert will first prompt you to select a customer or counter sale.
* The
X
key is used to leave The Retail Cashbox II program or if you are in a submenu, the help screen or calculator it will bring you back
to this main work screen.
* The following is a list of the functions available on the main work screen.
* ADD: Has two choices, first when the work sheet is blank it will bring up the customer list. Once a customer is selected selecting Add from
then on will then bring up the inventory pop-up list.
* PROCESS: will bring you to the transaction menu if the work sheet is not blank. After picking your customer and inventory items to sell, Process
will complete your sale, quote, return, layaway or payment.
* OPTIONS: Is used for selecting the options for the current work sheet, such as discounts, taxable, serial numbers, invoice history, layaways
and quote logs.
* EDIT: will allow you to edit the customer or work sheet inventory items.
* CLEAR: Is used to clear the worksheet of customer and inventory information. This action will be logged for later evaluation.
* LOOKUP: Menu is used for quick retrieval of serial numbers, customers, inventory items, invoice numbers and notes on customers.
* MENU: This item will place you in the menu screens. All of the functions listed above will be explained in the following pages.