Lightning Bolt Computers (734) 395-9367 http://www.lightbolt.com
29
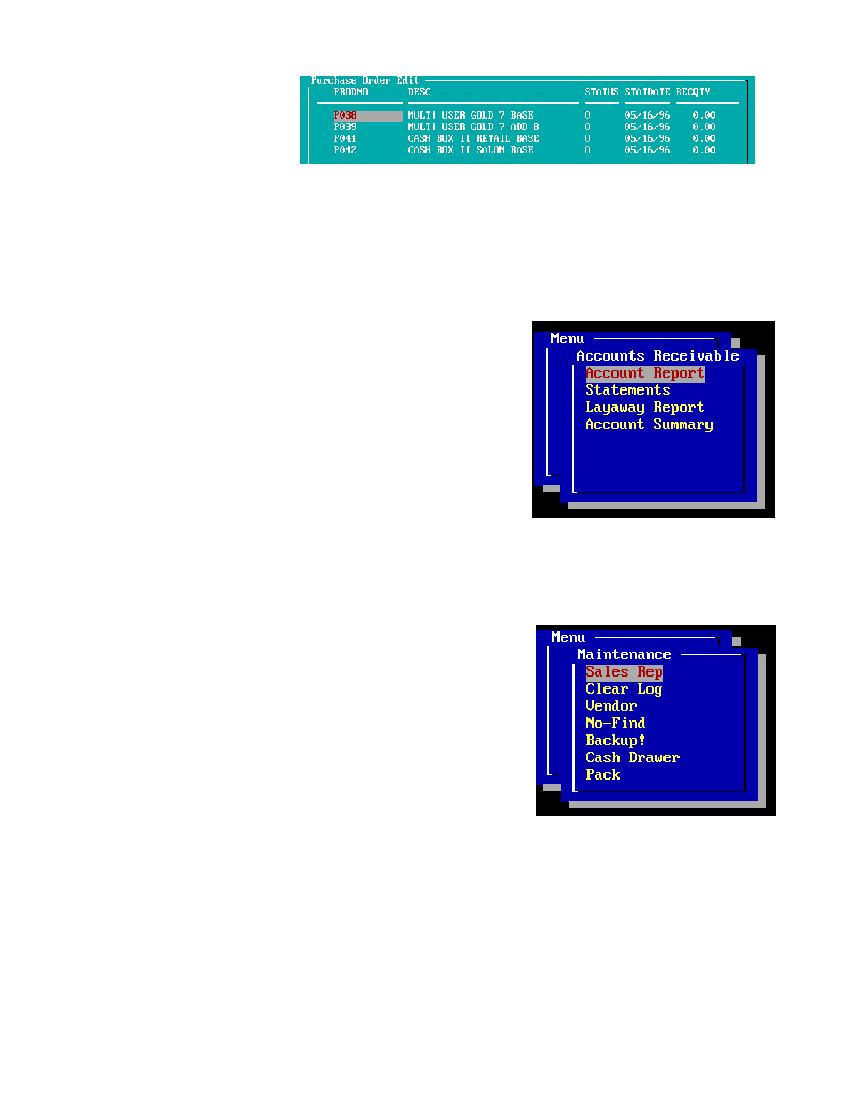
Process Purchase Order
* PROCESS PURCHASE ORDER: Pick a vendor from the list. A list of the PO�s will be shown, highlight the order you wish to
process and press (Enter). A small box will appear. If you select Process Order the order will have the status field fined in by the
computer with an (R) for received and the quantity will be fined in as the order was written. This choice will process and update the
inventory. If you pick Edit the order then the order is shown with the highlight located on the first product number. Highlight the item
you wish to edit and press the (Enter) key. A new box will appear use your (Arrow) keys to move to the status field and type in your
choice of codes from the bottom of the screen. Next move to the (Recqty) field and input the number of items you have received. You
can now change the other fields that may pertain to this order. If, for example you change the cost on an item the item will be updated
and a new average cost will be placed into the inventory. To leave the edit screen press the (Esc) to stop. A small box will appear with
save and abort. Select the action you would like and press (Enter).
Process Purchase Order
Accounts Receivable Menu
* From this menu you can either display a account or layaway report.
* ACCOUNT RECEIVABLE: From this menu you may pick a single customer and press (Enter) or press (F3) for all customers. This is
a simple report that will show you customer number, invoice date, charges, payments and balance due. Interest is also calculated on late
charges.
* STATEMENTS: This function is used to print statement for one or multiple customers for balance due on account.
* LAYAWAYS: From this menu option you will be able to view layaway status of one or all customers.
Accounts Receivable Menu
Maintenance Menu
* This menu lets you add, edit or delete sales reps and look at the transactions cleared before printing. You can also Add, Edit or Delete
vendors, Not in inventory items.
* Sales Rep, Vendor, NO-Find, Customer type all work the same way. From these screens you can Add, Edit or Delete any field or line.
Use the up and down (arrow keys) to highlight you choice or (Delete) to delete an item. To edit an item highlight the item and press the
(Enter) key, the edit screen will appear. Move the cursor to the line you want to change and type in the new information. For the
information to be saved you need to go to the next line before pressing the (Esc) key to leave the edit screen. If you want to add new
information move the (down arrow) key until you get a blank edit screen to enter into. To Delete an item press the (Delete) key, the
item will be removed from the screen. To leave the screen press the (Esc) key, all changes will be saved.
* Use the Cash Drawer option to set the amount of money you would like to have in your Cash Drawer. Select Cash Drawer from the
menu with your arrow keys and press (Enter). Type in the amount of your cash drawer and press (Enter).
* Pack: will clean out deleted information and pack your files for better use. If you have an error during the running of the program it is
best to re-pack your databases before calling for support.
Maintenance Menu